
Cut Content
Intro
The Sinclair Solutions Deluxe DLC 1 is an unofficial DLC created for BioShock 2 Multiplayer. Its purpose is to make unused content, which was left in the game files, available for public use and bring new content to the game after nearly 14 years.
Features
| Feature | Image | Description |
|---|---|---|
| Melee Weapon | This weapon utilizes your character's unique melee attack as a primary weapon. | |
| Poison Quills | Grants the unused plasmid Poison Quills which disables other players' plasmids for 10 seconds. | |
| Cold Punch | Adds a freezing effect to your melee swings, allowing you to freeze enemies and turrets / vending machines. | |
| Fire Punch | Adds a burning effect to your melee swings, setting enemies and objects on fire. | |
| Zap Punch | Adds a stunning effect to your melee swings, stunning enemies. | |
| Adrenaline Eve | Provides Eve in return for any damage taken in a 1-to-1 ratio. | |
| Super Health | Grants 10 additional bonus health, allowing you to survive most one-shot attacks. | |
| New Loading Screen Thumbnail | Fixes a Day 1 Bug with Mercury Suites where the Loading thumbnail incorrectly showcases the Apartment Lobby's thumbnail. Now Showcases the proper thumbnail. | |
| New FOV Fix | The included UserMP.ini now has a new FOV fix which will work 100% of the time and changes the FOV immediately once pressed. Note: The ForegroundFOV still requires correct timing, but there are now more opportunities to trigger the fix before spawning. |
DLC Installation
- Download the DLC from the release section of the Github. Releases
- Backup "ConfigureLoadout.swf", "SharedLibrary.swf", and "Loading.swf" from
SteamLibrary\steamapps\common\BioShock 2\MP\Content\FlashMoviesby copying them to a new folder. - Drag and drop the new "ConfigureLoadout.swf", "Loading.swf", and "SharedLibrary.swf" from the "DLC 1 - Cut Content" and "Shared" folders respectively into the directory listed in step 1.
- Backup your "UserMP.ini" file from
\AppData\Roaming\Bioshock2Steamby copying it into a new folder. - Drag and drop the new "UserMP.ini" file from the from the "DLC 1 - Cut Content folder" to replace the existing file.
- Read the "UserMP Configuration" section below and make any changes to your "UserMP.ini".
- Launch the game.
- Press
~(tilde) at the main menu to activate the DLC.
⚠️ Warning
You will need to do this every time at launch.
- Check the Loadout menu to confirm the new items have been added.
Assistance
If you have any questions or concerns, please join the BioShock 2 Multiplayer Discord and ask for help installing.
| Discord |
|---|
Uninstall
To uninstall the DLC and revert to the vanilla game version, simply replace all downloaded files with your backups. If this doesn't work, you can verify the integrity of the game files within your Steam library. If verifying still does not work, you will need to reinstall the game.
UserMP Configuration
Re-apply Your Keybinds In-Game
After updating the "UserMP.ini" file, re-apply your keybinds within the game.
Mouse Sensitivity Settings
A new sensitivity modifier has been added to the "UserMP.ini" file. The default sensitivity has been changed from 2000.0 to 200.0. To modify this value, follow these steps:
With "UserMP.ini" open, press
Ctrl+Fto open the search box.Type
Alias=XSensinto the text field, then pressEnter. This will bring you to the following line:
Aliases[19]=(Command="Axis aMouseX Speed=200.0",Alias=XSens)Modify this line, replacing 200.0 with your chosen value.
Save the file, either by pressing
Ctrl+Sor choosing "File > Save" from the menu bar.
Field of View Settings
A new FOV modifier has been added and is bound to the - (minus) key and Up D-Pad button on controller. It uses FOV values from the console version. To modify these FOV values, follow these steps:
With "UserMP.ini" open, press
Ctrl+Fto open the search box.Type
Alias=FOVinto the text field, then pressEnter. This will bring you to the following line:
Aliases[21]=(Command="set PlayerController DesiredFOV 75|set PlayerController DefaultFOV 75|set PlayerController ForegroundFovAngle 70|set PlayerController DefaultForegroundFOV 70", Alias=FOV)Replace
75in both places it occurs with a background FOV value of your choice, between 0 and 180.Replace
70in both places it occurs with a foreground (weapon) FOV value of your choice, between 0 and 180.Save the file, either by pressing
Ctrl+Sor choosing "File > Save" from the menu bar.
FOV Details
DesiredFOVandDefaultFOVadjust the background (map/world) FOV.ForegroundFOVAngleandDefaultForegroundFOVadjust the foreground (weapon/viewmodel) FOV.- The FOV values have been changed from 75/60 (PC FOV) to 75/70 (XBOX/PS3 FOV).
📝 Note
The background FOV always changes when the keybind is pressed. However, the foreground FOV may or may not change immediately; it will take effect after the player dies once and respawns.
Mouse Acceleration Fix
The mouse acceleration fix has been automatically applied to your UserMP.ini under the MoveForward alias. This includes the MouseAccelThreshold and MouseSmoothingMode values.
Screenshots
| Title | Image |
|---|---|
| New DLC Items | 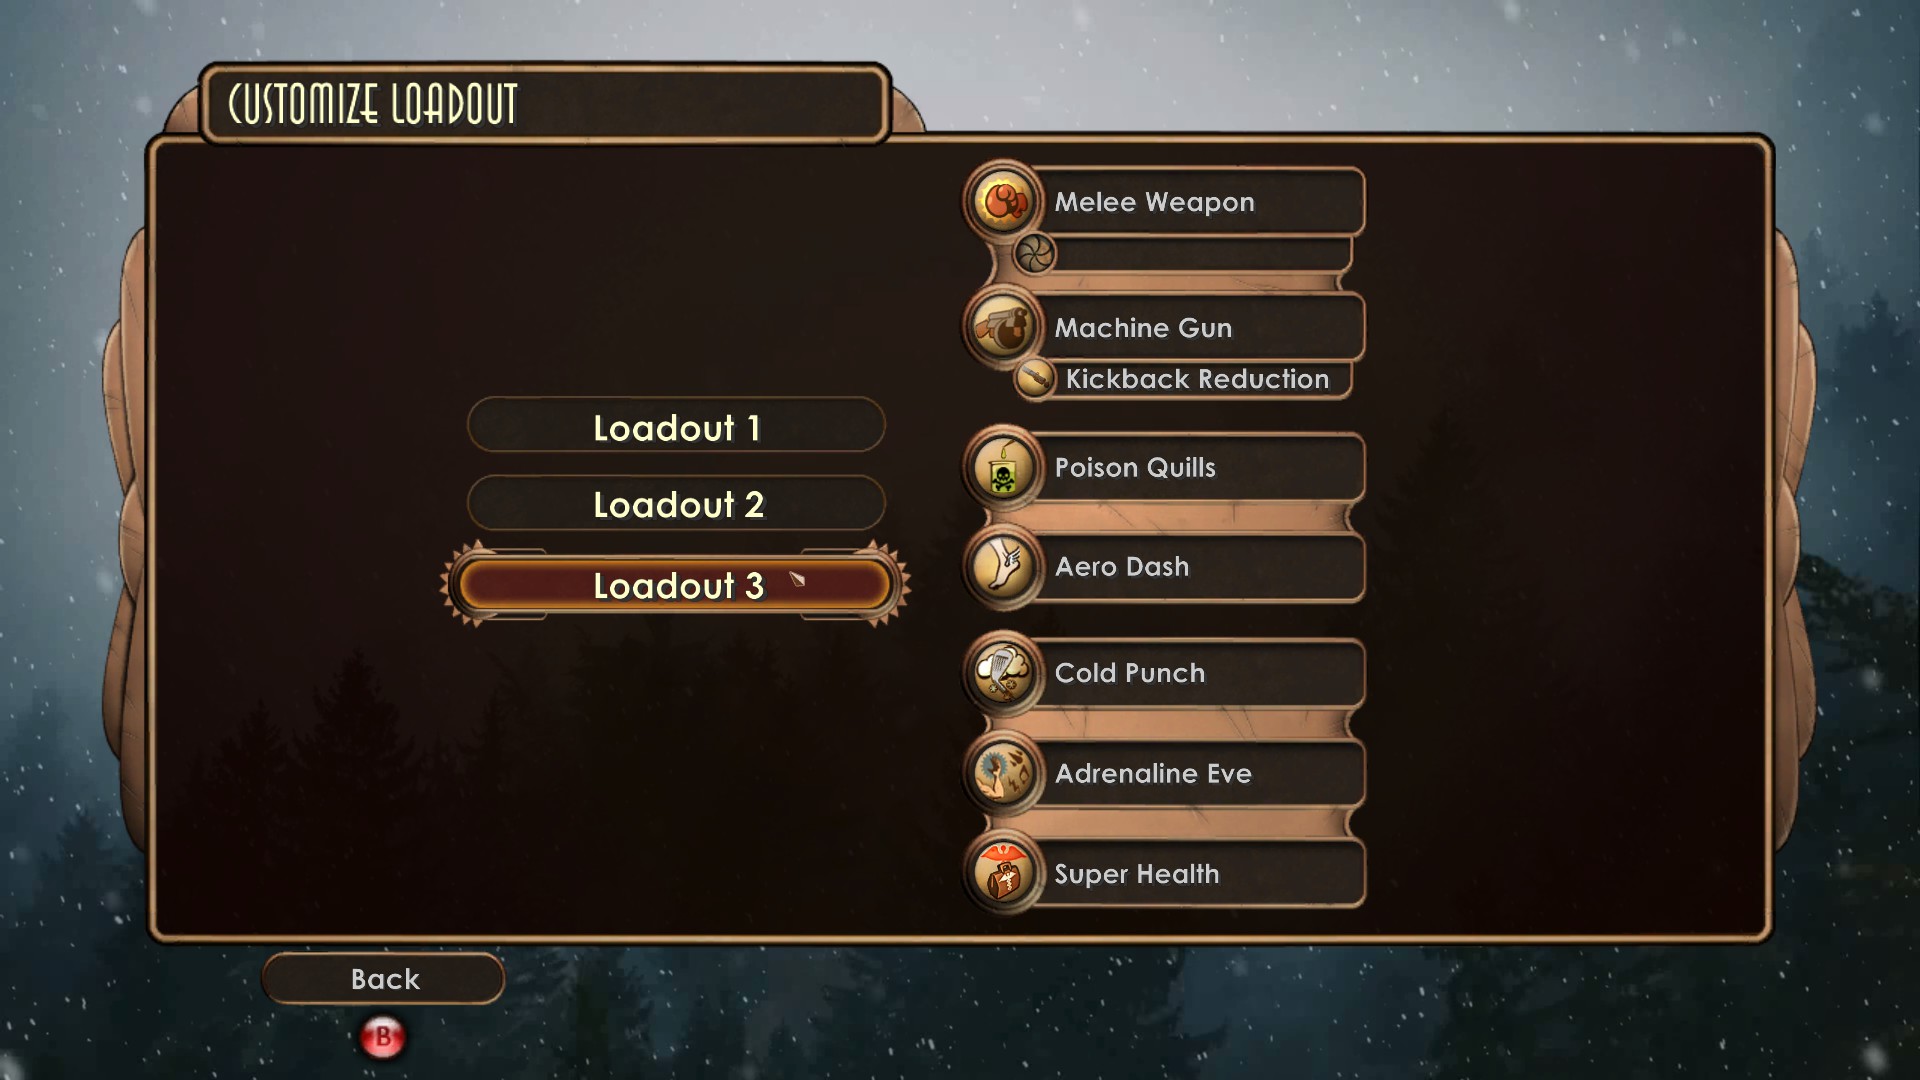 |
| New DLC Items In-Game | 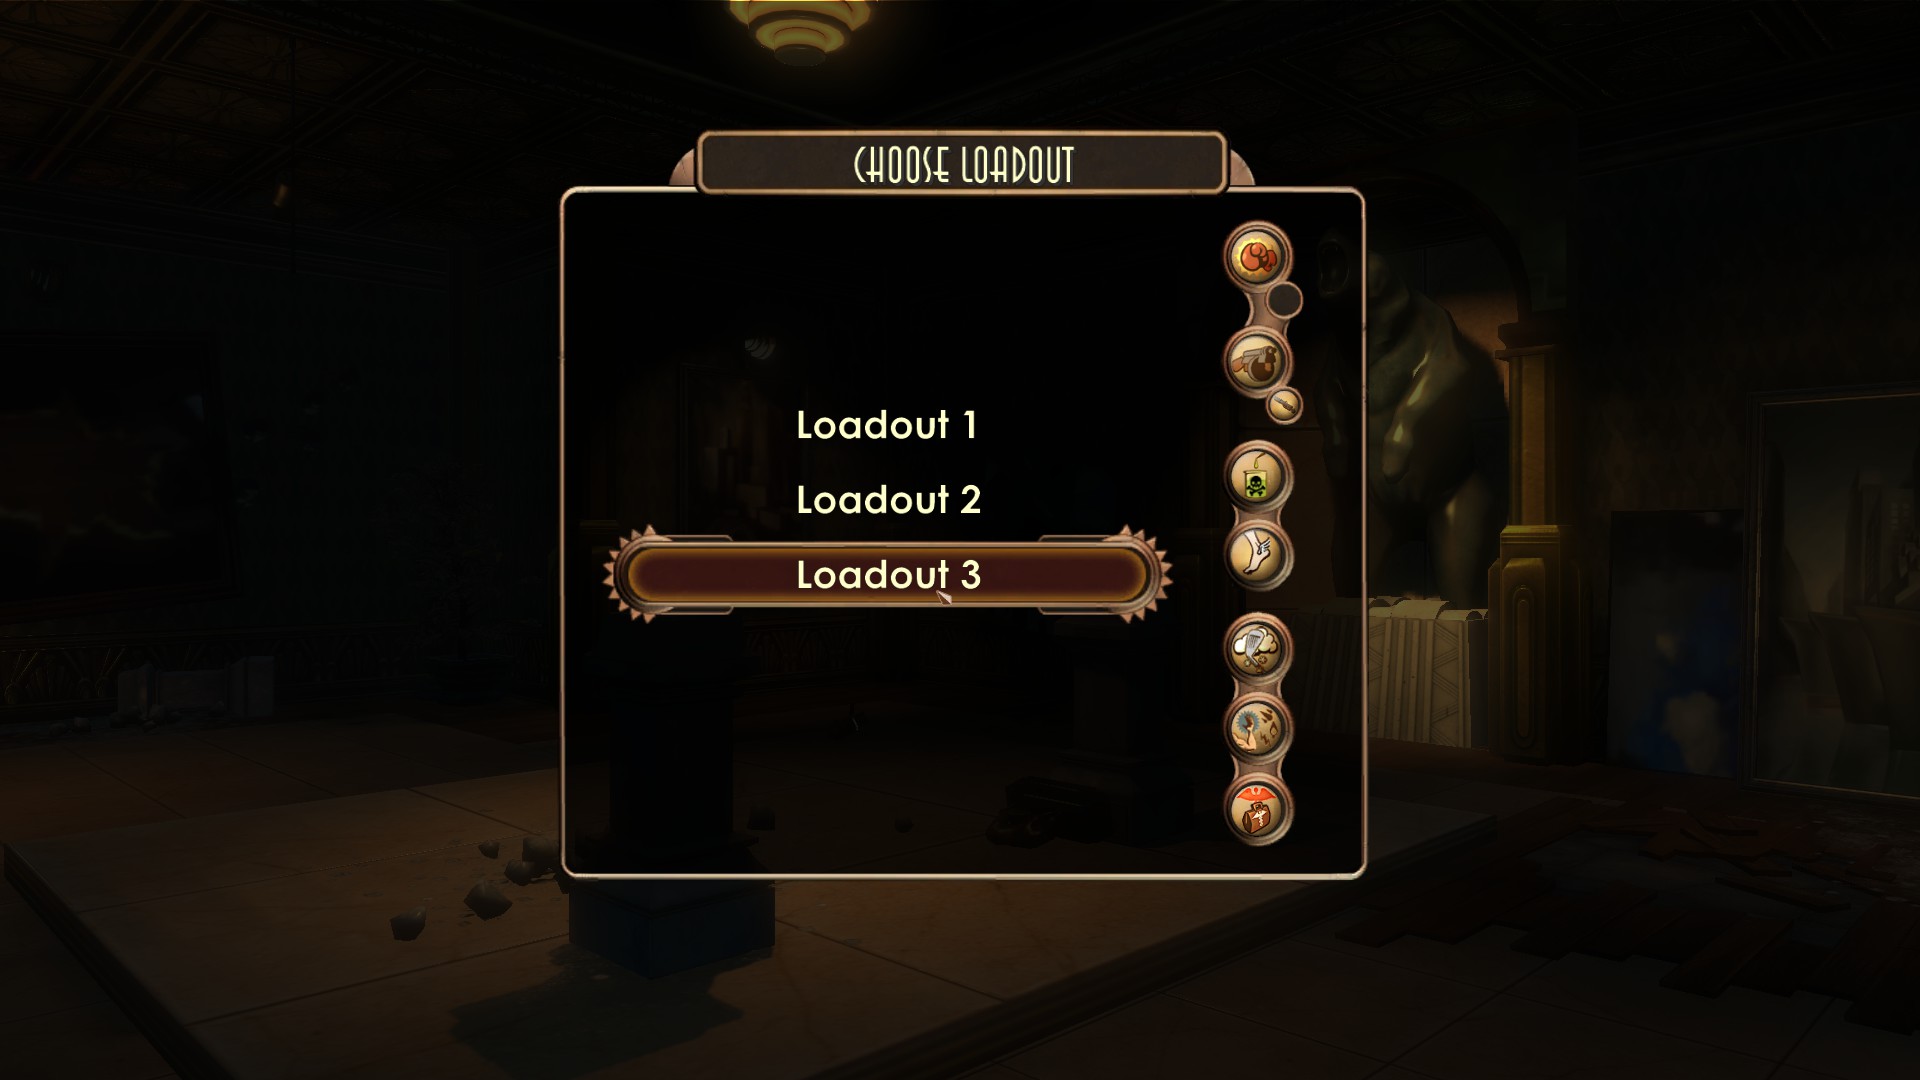 |
| New DLC Items In-Loadout | 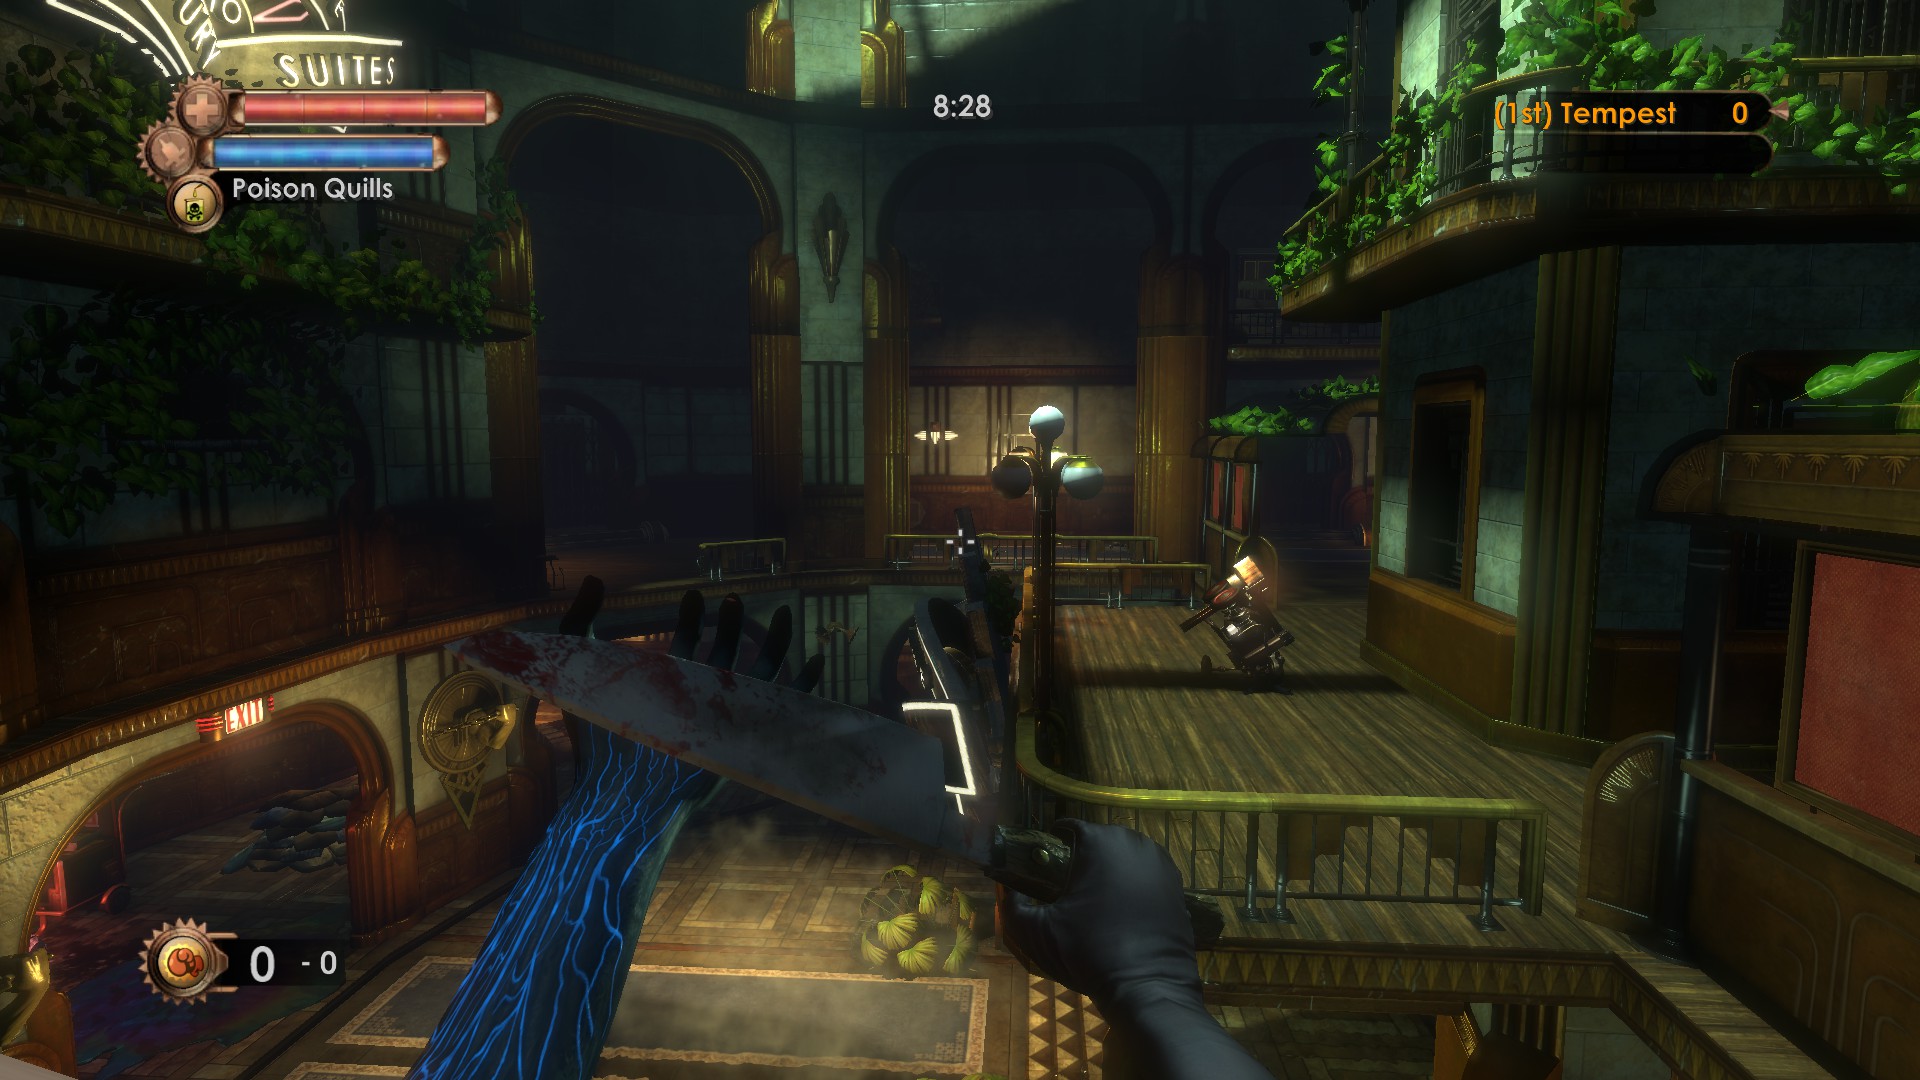 |
| Mercury Suites Thumbnail | 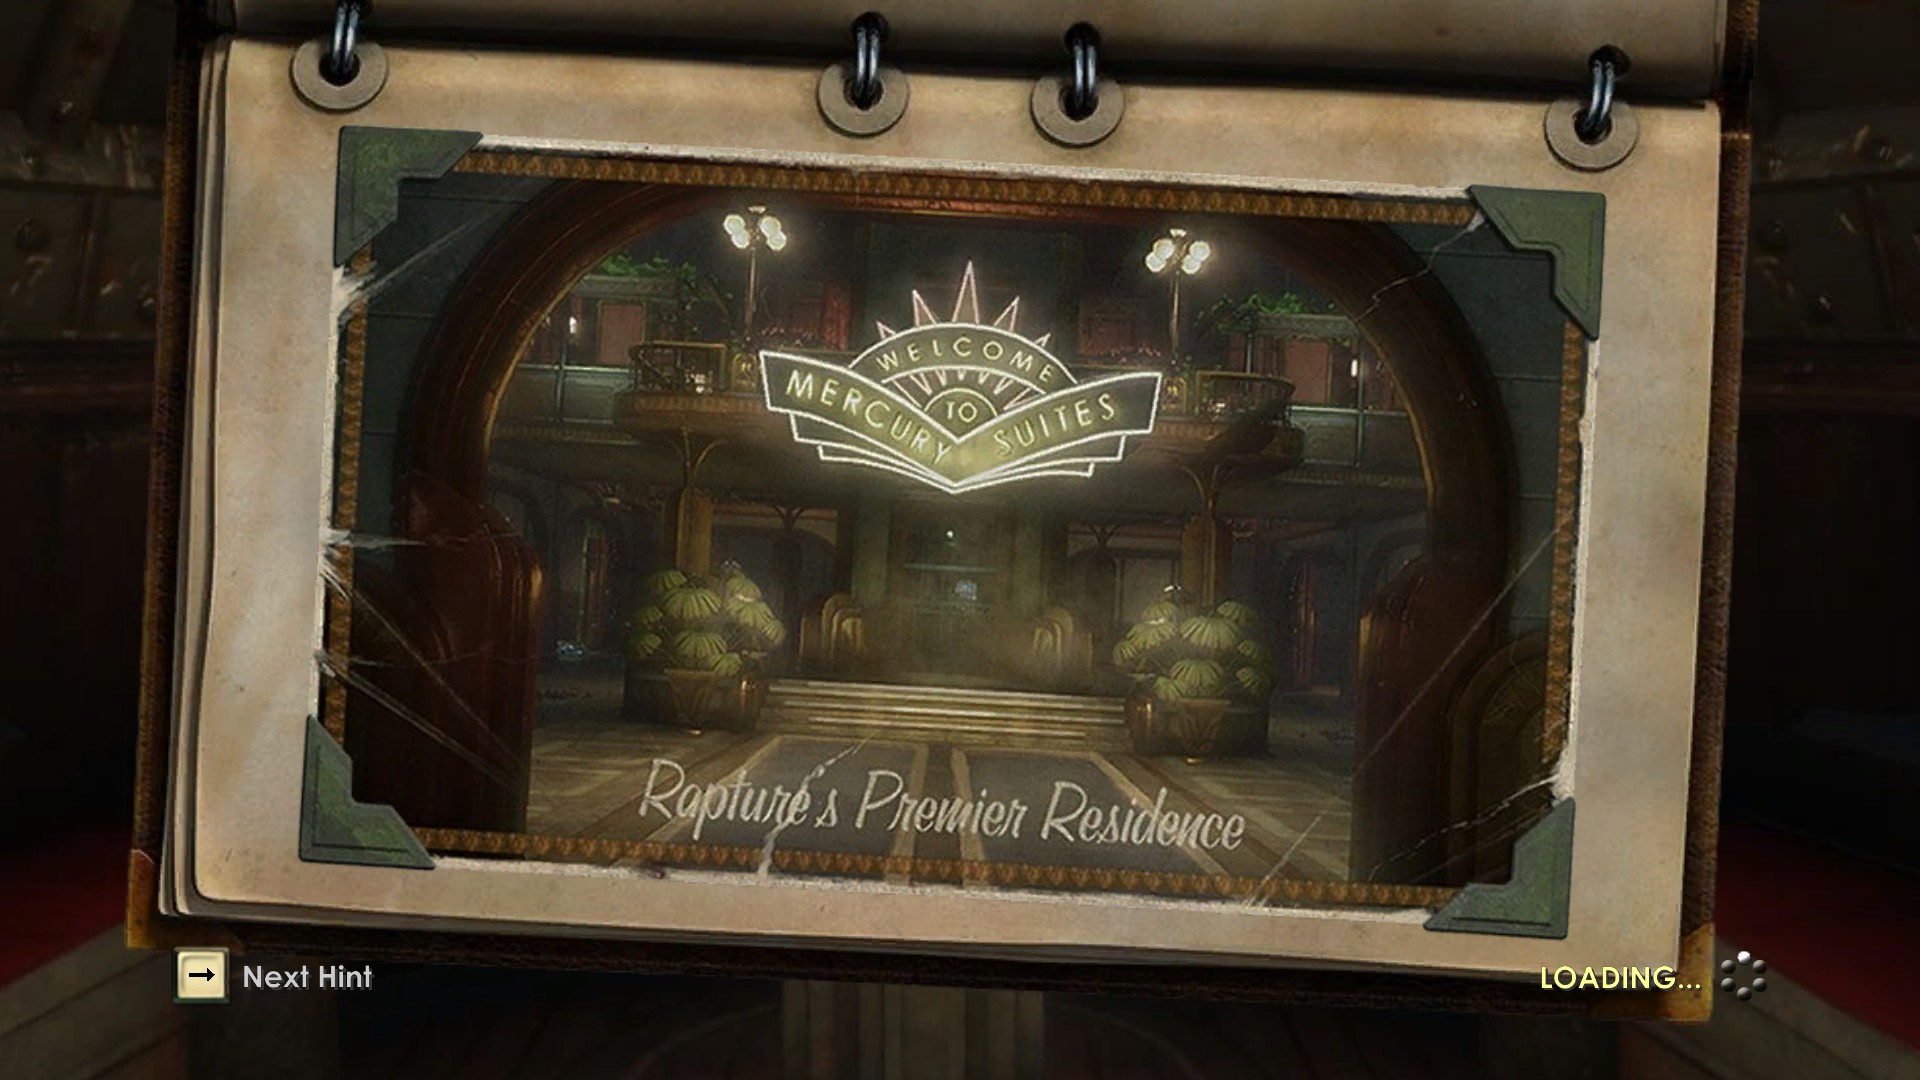 |